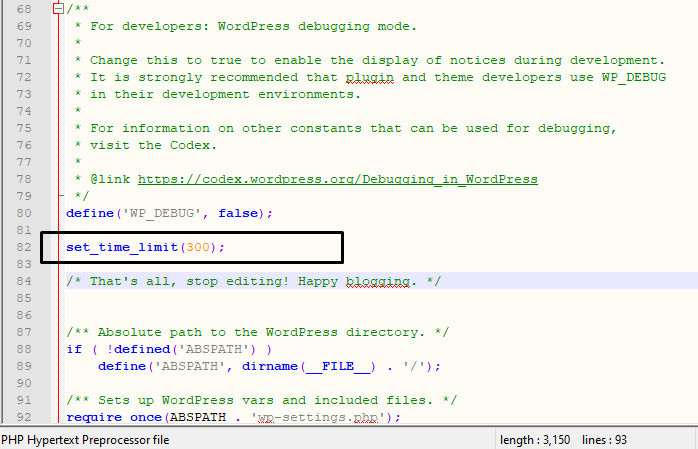
Deploying a WordPress website securely is essential to protect your data and ensure stable site performance. One crucial file in this setup is wp-config.php, the central configuration file that connects WordPress to your database and defines key settings for performance and security. However, it’s not typically safe to modify this file manually on a live site—this is where the setup-config.php script comes in. This built-in file helps users set up the configuration automatically through a guided interface. Understanding how to securely use and manage this file is vital for anyone deploying WordPress.
What is setup-config.php?
The setup-config.php file in WordPress is responsible for creating the wp-config.php file. When a new WordPress installation is initiated and the configuration file does not exist, WordPress redirects users to setup-config.php. This user-friendly setup script helps users provide database details and generates a secure wp-config.php file accordingly.
Why Security Matters in Configuration
Because wp-config.php contains sensitive data—like database passwords—it’s imperative that setting it up through setup-config.php is done with strong attention to security best practices. Improper configuration or leaving the setup script unintentionally accessible can expose your site to vulnerabilities.
Step-by-Step Secure Setup Using setup-config.php
1. Prepare the Environment
- Create a secure server: Use a reputable hosting provider and make sure your server stack includes the latest versions of PHP and MySQL/MariaDB.
- Download WordPress: Always download WordPress directly from the official site https://wordpress.org to avoid tampered files.
- Connect with SFTP: Use secure tools such as FileZilla or a secure command-line interface for file transfer and manipulation.
Upload the extracted WordPress files to your web server directory (typically public_html or htdocs).
2. Set Secure File Permissions
Before running setup-config.php, it’s essential to limit file permissions:
- Set files to 644 and directories to 755
- Make sure the server user owns the files (e.g.,
chown -R www-data:www-data wordpress/)
Ensuring that only necessary users have access can thwart many exploitation attempts even before they happen.
3. Create the WordPress Database
Either via terminal or hosting control panel (such as cPanel or phpMyAdmin), create a dedicated database and assign it a strong, unique user:
- Database name: something_random_wp
- User: custom_wp_user
- Password: A complex string with letters, numbers, and special characters

4. Execute setup-config.php
Navigate to your WordPress URL. For example, if you uploaded files to https://example.com, and wp-config.php doesn’t exist yet, loading the site will redirect you to:
https://example.com/wp-admin/setup-config.php
The interface will walk you through these inputs:
- Database Name: Enter the database you created earlier
- Database Username and Password
- Database Host: Usually “localhost”, unless you’re using a managed host
- Table Prefix: Change it to something custom (e.g. wpsite_) to add extra obscurity
After submitting this form, WordPress builds your wp-config.php file and attempts to connect to the database. If successful, you’ll be redirected to the main installer.
5. Harden wp-config.php
Once wp-config.php is created, you can further enhance it by adding security configurations manually:
- Move it one directory above the root: WordPress can still detect it if it’s located above public_html.
- Disable scripts editing:
define('DISALLOW_FILE_EDIT', true); - Limit access: Use .htaccess to deny web access:
<Files wp-config.php>
    order allow,deny
    deny from all
</Files>

6. Delete setup-config.php
After WordPress setup completes, it’s critical to remove or restrict setup-config.php. It doesn’t usually persist post-installation, but if it does, delete it:
- FTP: Go to the root directory and delete setup-config.php
- Command-line:
rm wp-admin/setup-config.php
Leaving setup scripts on the server poses a significant security risk, especially if there’s a misconfiguration that allows it to execute again.
7. Final Touches
Now that your config file is set, try the following for a cleaner and safer environment:
- Set automatic core updates:
define('WP_AUTO_UPDATE_CORE', true); - Add Authentication Unique Keys and Salts: Visit WordPress Salt Generator and paste the generated lines into wp-config.php
- Disable PHP execution in uploads:
<Directory "/wp-content/uploads/">
  php_flag engine off
</Directory>
Conclusion
Setting up setup-config.php properly and securely is a small but critical step in the larger puzzle of a safe WordPress deployment. It not only leads you to a tailored wp-config.php, but also directs how you manage permissions, database credentials, and runtime security measures. Always ensure that unnecessary scripts like setup-config.php are removed after use, and that your configuration files are guarded against public access.
Frequently Asked Questions (FAQ)
- 1. Is it safe to leave setup-config.php on the server?
- No, once installation is complete and wp-config.php has been generated, it’s highly recommended to remove or restrict access to setup-config.php.
- 2. How can I further secure wp-config.php?
- You can move it one directory above the root, apply strict file permissions (400 or 440), and deny access via .htaccess configurations.
- 3. What should I do if setup-config.php gives a database error?
- Check if the database credentials are accurate, ensure the user has the correct privileges, and confirm MySQL is running properly on your host.
- 4. Can I skip setup-config.php and manually create wp-config.php?
- Yes, advanced users often manually create and upload wp-config.php with their predefined settings to increase control.
- 5. What file permissions are ideal for wp-config.php?
- Set the permission to 400 (owner-readable only) or 440 depending on your server’s configuration for maximum security.
