In this article, I’ll tell you How to Fix Featured Image From Auto Cropping in WordPress. However, your theme auto cropping your featured image to something like this dimension 700x420.
Fix Featured Image From Auto Cropping in WordPress
If you want to show your featured images on your website in the original size instead of crop image. Follow the below steps:
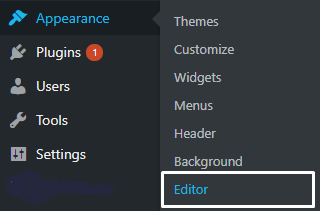
- Go to dashboard and navigate Appearance > Editor
- Once you click on “editor”, select the theme you’re using. So you can edit your current theme to fix auto cropping featured image.
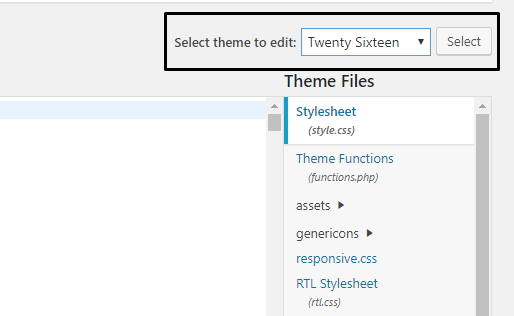
- Now find the functions.php file on the left-hand side panel (Theme Functions).
- Once you find the file, search add_image_size by
CTRL+F
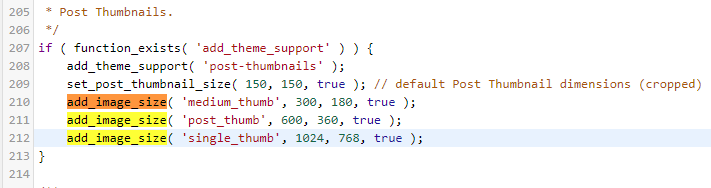
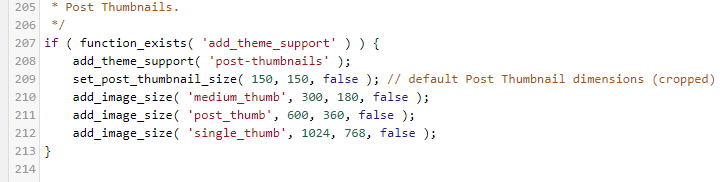
- Now you just have to change true value to false. This will disable the auto-cropping feature image in WordPress.
- After changing the value “Update File” but make sure the code will look like this
After updating the function.php file, you have to install and activate a plugin name Regenerate Thumbnails. This plugin will regenerate all featured image in original size.
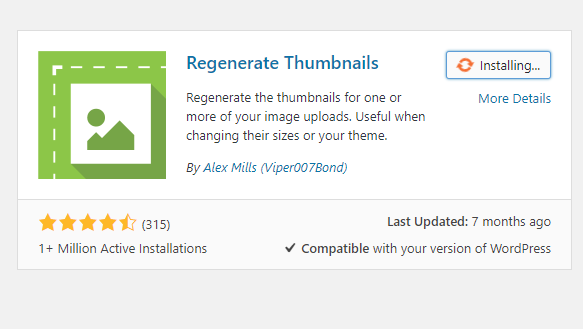
Once you installed Regenerate Thumbnails. Go to Tools > Regenerate Thumbnails.

Now click on second option or both and wait until all images will be resized.
Note – If you can’t access the WordPress dashboard, you can do this step by FTP.
Just navigate the theme folder (/wp-content/themes/your-theme-name/functions.php). View and edit the function.php and find add_image_size and change the value as I said above.