If you just install WordPress on your hosting, you definitely asking how to install a WordPress plugin? Plugins are one of the key things that make WordPress awesome. Plugins allow you to add new features to WordPress such as add a forum, slideshow, new widgets etc. There are thousands of free and paid plugins available for WordPress.
In this step by step guide, we will show you how to install a WordPress plugin.
How to install a WordPress plugin that is FREE
To install a plugin you just need go admin panel and search for Plugins tab above users in Version 4.9.8.
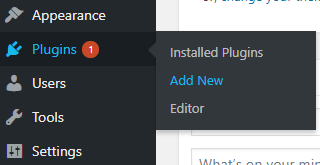
Hover the mouse point to “Plugins” in the sidebar menu and Then, click on the “Add New” button. And you will be on Plugins > Add New: http://www.your-domain.net/wp-admin/plugin-install.php.
Then you will see a below page that shows you a short list of featured/recommended plugins.

Now search for a plugin that you need. For example, I want to install Wordfence so I’ll Input the plugin name “Wordfence” that you want to install in that search field.
WordPress automatically will show the matching result, might you get a ton of option with the same plugin name. In this case look for author name of the plugin that you’re going to install.
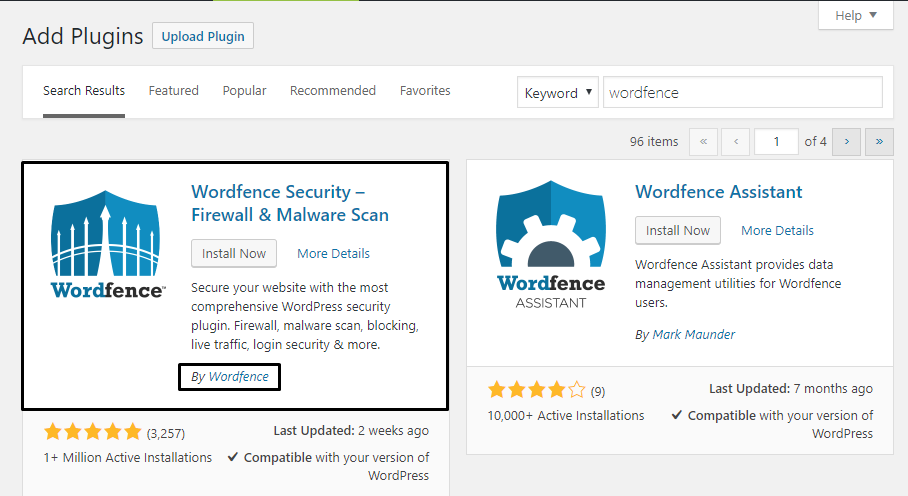
Now all I need to do now is click on the “Install Now” button. So WordPress is going to fetch the plugin from their server and install it on your server site. Just like installing an app from play store or App store.
Once you clicked on Install button, you’ll see this:
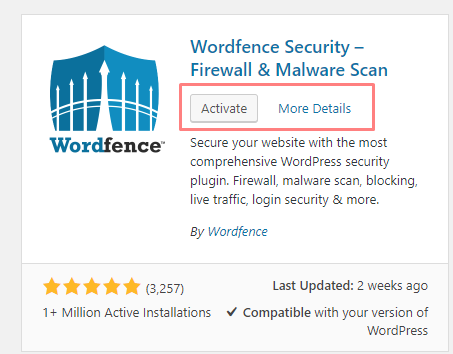
All you have to do is click on Activate button and the plugin will install and WordPress will let you know by a small note at the top of the page.
How to Install a WordPress plugin using the upload
However, some WordPress plugins are not listed in the WordPress plugin directory. So these plugins cannot be installed using the first method.
That’s why WordPress has the Upload method to install such plugins that are paid or not listed in WordPress plugin directory.
First, you need to have a plugin in .zip format. Next, you need to go to the WordPress admin area and visit Plugins » Add New page and click “Upload plugin”.
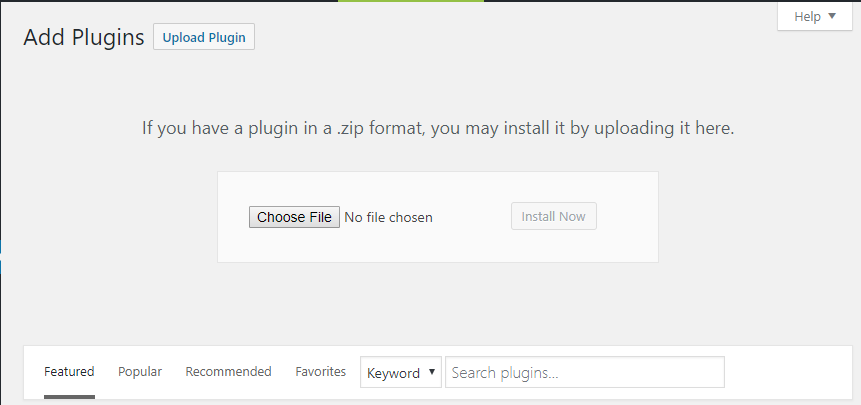
Now choose the file .zip file you have and click on “Install Now” button.
now WordPress will upload the plugin file from your computer to your server and install it for you. Once installed, you need to click on the Activate Plugin link to start using the plugin.
How to Install a WordPress Plugin using FTP
Install plugin using FTP is easy as above methods, you just have FTP access of site server.
First, you need to have a plugin in .zip format as above method. But in this case, you don’t have to a .zip format file, you need to extract the zip file on your computer.
Now extracting the plugin zip file will create a new folder with the same name. This is the folder that you need to manually upload to your website using an FTP client software.
Open the FTP client on your computer and connect to your website using the login credentials provided by your web host.
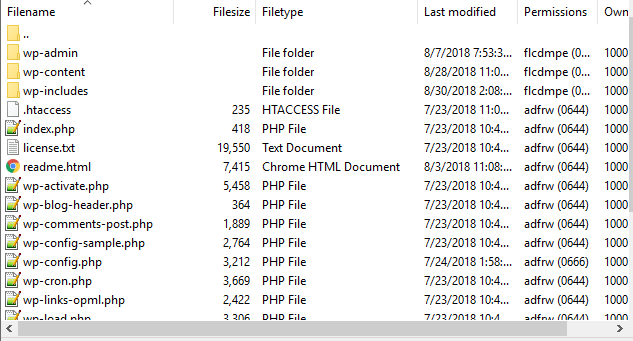
Once connected, navigate this path /wp-content/plugins/. And upload a plugin file in plugins folder under wp-content.
After uploading the files, visit the WordPress admin area and click on the Plugins link in the admin menu. You will see your plugin successfully installed on the plugins page.
That’s it for how to install a WordPress plugin. I hope this has been helpful. If you have any questions, feel free to submit them in the comments below.