Fully wiping a Windows PC is a serious process. It is not the same as deleting files, emptying the Recycle Bin, or performing a quick reset. A proper wipe is intended to remove personal data so it cannot be easily recovered, whether you are selling the computer, donating it, recycling it, returning it to an employer, or preparing it for a fresh installation.
TLDR: Back up anything you want to keep, sign out of accounts, and confirm whether your PC uses an SSD or HDD. For most modern Windows PCs, use Reset this PC with Remove everything and enable Clean data for a stronger wipe. If you are handling highly sensitive data, use manufacturer secure erase tools, BitLocker encryption before reset, or physically destroy the drive when appropriate. Always verify the computer boots to setup or a clean Windows installation before handing it over.
Before You Begin: Understand What “Fully Wipe” Means
A full wipe means removing your files, applications, accounts, saved passwords, browsing data, license keys, and personal settings from the machine. The goal is to make recovery impractical for the next person who receives the computer. However, the correct method depends on the type of storage device inside your computer.
- SSD: Most modern laptops and desktops use solid state drives. SSDs handle data differently from traditional drives, so repeated overwriting is not always the best method. Encryption, Windows reset options, and manufacturer secure erase tools are usually preferred.
- HDD: Older computers often use mechanical hard drives. These can be securely wiped by overwriting the drive once or multiple times, although this can take several hours.
- Business or regulated data: If the computer contains financial, medical, legal, or confidential business information, follow your organization’s data destruction policy rather than relying only on consumer reset tools.
Important: Once completed correctly, a wipe is usually irreversible. Do not begin until you are certain your important data is backed up.

Step 1: Back Up Your Important Files
Before wiping the PC, copy anything you want to keep to a safe location. This may include documents, photos, videos, browser bookmarks, desktop files, email archives, accounting files, saved game data, and software license information.
Good backup options include:
- External hard drive or USB drive: Simple and reliable for one-time backups.
- Cloud storage: Services such as OneDrive, Google Drive, Dropbox, or iCloud Drive can preserve important documents and photos.
- Full system image: Useful if you may need to restore the entire computer exactly as it was.
After backing up, open a few files from the backup location to confirm they are readable. Do not assume the backup worked just because the copy process finished.
Step 2: Sign Out of Accounts and Deauthorize Software
Before erasing the computer, disconnect it from your personal accounts and licensed services. This reduces security risks and avoids problems activating software on another machine.
- Sign out of your Microsoft account in Windows.
- Remove the device from your Microsoft account online, if you no longer plan to use it.
- Sign out of browsers such as Chrome, Edge, or Firefox.
- Deauthorize paid software, such as Adobe apps, Microsoft Office, music production tools, or specialized business programs.
- Remove saved passwords from browsers or password managers if they are stored locally.
- Sign out of cloud storage apps and confirm syncing has completed.
If the PC belongs to an employer, school, or organization, do not wipe it without permission. Managed Windows devices may require administrator approval or special recovery procedures.
Step 3: Check Whether the Drive Is Encrypted
Encryption helps protect your data. If your drive is already encrypted with BitLocker or Windows device encryption, wiping becomes safer because deleted data remains protected by encryption keys that are removed during reset.
To check BitLocker status:
- Open the Start menu.
- Search for BitLocker.
- Select Manage BitLocker.
- Check whether protection is turned on for the main drive.
If BitLocker is available and you are preparing to sell or donate the PC, turning it on before resetting the computer can add an extra layer of protection. Allow encryption to complete before starting the wipe. This may take time, especially on large drives.
Step 4: Use Windows “Reset This PC” to Remove Everything
For most users, the safest built-in method is Windows Reset. It removes personal files, apps, and settings, then reinstalls Windows. The key is selecting the stronger cleaning option rather than a quick reset.
On Windows 11:
- Open Settings.
- Go to System.
- Select Recovery.
- Under Recovery options, choose Reset PC.
- Select Remove everything.
- Choose Local reinstall or Cloud download.
- Open Change settings.
- Turn on Clean data.
- If the PC has multiple drives and you want to wipe them too, enable Delete files from all drives.
- Confirm your choices and start the reset.
On Windows 10:
- Open Settings.
- Go to Update & Security.
- Select Recovery.
- Under Reset this PC, click Get started.
- Select Remove everything.
- Choose whether to reinstall from the cloud or locally.
- When asked about additional settings, choose the option to clean the drive.
- Proceed only after verifying that the settings match your goal.
Clean data takes longer, but it is more appropriate when another person will receive the computer. A quick reset may remove file references while leaving recoverable data behind.
Step 5: Decide Between Local Reinstall and Cloud Download
Windows may ask whether you want a Local reinstall or Cloud download. Both can be valid.
- Local reinstall: Uses files already on the PC. It is faster and does not require a large download, but it may fail if Windows system files are damaged.
- Cloud download: Downloads a fresh copy of Windows from Microsoft. It is often more reliable if the existing installation is corrupted, but it requires a stable internet connection and several gigabytes of data.
If your priority is a clean handoff and you have reliable internet, Cloud download is a strong choice. If you only need to wipe the machine quickly and the current Windows installation is healthy, Local reinstall is acceptable.
Step 6: Wipe Additional Drives
Many desktop PCs and some advanced laptops have more than one drive. Windows may be installed on one drive while personal files are stored on another. If you reset only the Windows drive, data on the secondary drive may remain intact.
During Windows Reset, look for an option such as Delete files from all drives. If you intend to sell or donate the entire computer, enable it. If you are keeping a secondary drive, remove it before wiping or confirm exactly which drives will be erased.
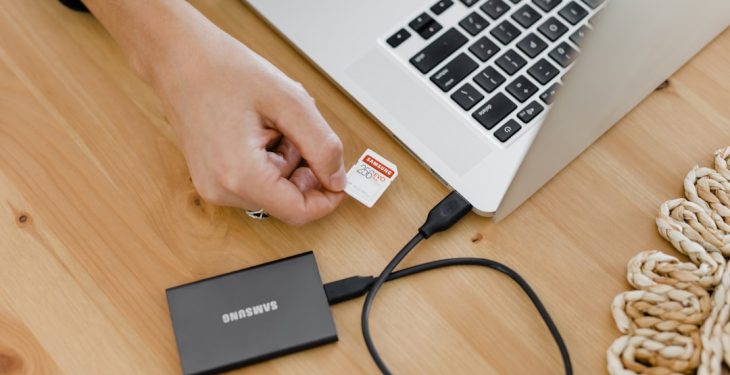
For external drives, wipe them separately. Do not leave USB drives, SD cards, or external hard drives connected unless you intentionally want them erased.
Step 7: Use Diskpart for a Manual Clean, If Needed
For advanced users performing a clean installation from Windows installation media, Microsoft’s diskpart tool can remove partitions before reinstalling Windows. This is powerful and dangerous, so use it carefully.
Boot from a Windows installer USB, open Command Prompt, and use commands such as:
- diskpart
- list disk
- select disk 0
- clean
The clean command removes partition information. For a stronger overwrite on traditional hard drives, clean all writes zeros to the entire drive, but it can take many hours. On SSDs, prefer encryption and secure erase methods rather than heavy overwriting.
Warning: Selecting the wrong disk can erase the wrong drive. If you are uncertain, do not use diskpart.
Step 8: Consider Manufacturer Secure Erase for SSDs
SSDs use wear leveling and internal memory management, so old data may not be overwritten in a simple, predictable way. Many SSD manufacturers provide tools that perform a proper secure erase or sanitize operation.
Examples include utilities from major drive manufacturers such as Samsung, Crucial, Western Digital, Seagate, Intel, and Kingston. The exact tool depends on your drive model. These tools may offer features named Secure Erase, Sanitize, or PSID Revert.
This method is especially useful if you are wiping a standalone SSD before reuse or resale. Always download drive utilities directly from the manufacturer’s official website and read the instructions carefully.
Step 9: Use Specialized Tools for Traditional Hard Drives
If the PC contains a mechanical hard drive and you want a more rigorous wipe than Windows Reset, a dedicated wiping tool can overwrite the drive. Tools such as bootable disk erasure software can write zeros or random data across the entire HDD.
For most personal situations, a single full overwrite is generally enough to prevent ordinary recovery. Multiple-pass wipes are usually unnecessary for modern drives, although some organizations still require them for compliance reasons.
Remember that a full HDD wipe can take a long time. Large drives may require several hours or even overnight to complete.
Step 10: Reinstall Windows or Leave the PC at Setup
After the wipe, decide what the next owner needs. If you are selling the PC, it is often best to reinstall Windows and leave it at the initial setup screen. This allows the buyer to create their own user account and settings.
If Windows Reset completes successfully, the computer should restart and show the first setup screen. Do not enter your own Microsoft account again. If the PC asks you to choose a region, keyboard layout, or network, you can usually shut it down at that point.
If you are recycling the PC or removing the drive, you may not need to reinstall Windows. In that case, the priority is simply ensuring the storage device no longer contains recoverable personal data.
Step 11: Verify the Wipe
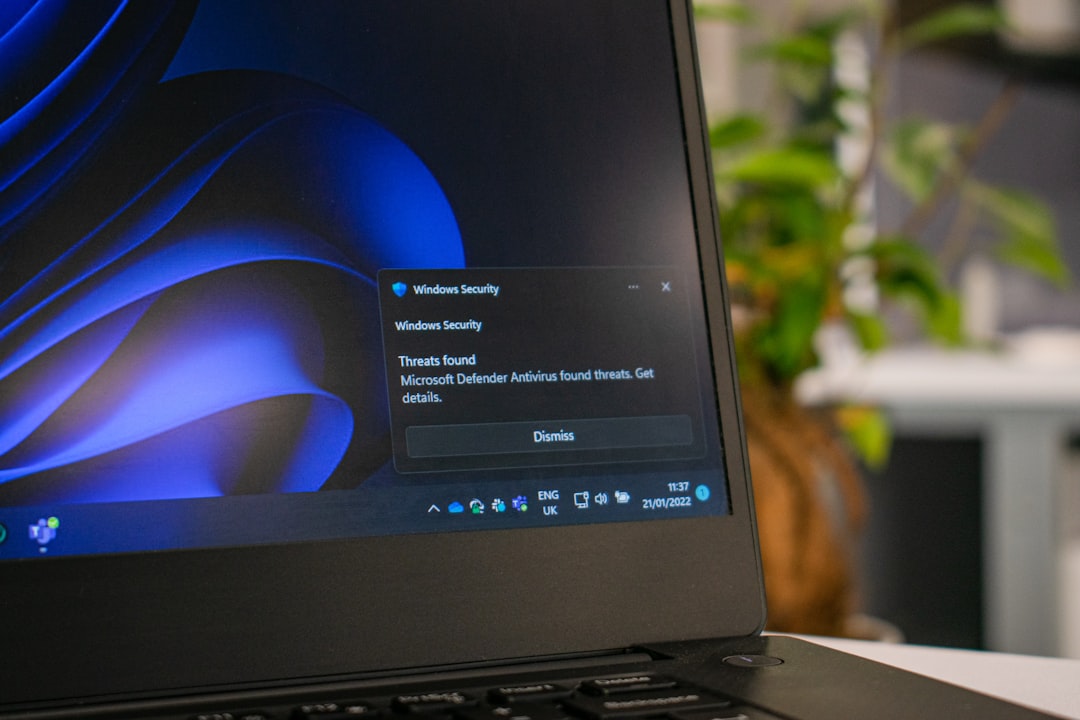
After the reset or secure erase, perform a basic verification. Turn the PC on and confirm that your old user account is gone. Check that personal folders, desktop files, and applications are no longer available. If Windows loads directly into your old account, the wipe did not complete correctly.
You can also open Disk Management during Windows setup or after reinstalling Windows to confirm the drive structure looks new. For highly sensitive situations, consider professional verification or certified data destruction.
When Physical Destruction Is the Best Option
If the drive contains extremely sensitive information and the PC is being discarded, physical destruction may be the most appropriate option. This is common for failed drives, confidential business systems, or devices that cannot be reliably wiped.
Physical destruction should be handled safely. Do not attempt to smash or drill drives without proper equipment and protective precautions. Many recycling centers and IT asset disposal companies provide certified drive shredding or destruction services.
Final Checklist Before Handing Over the PC
- Backup completed and tested.
- Accounts signed out and device removed from online accounts.
- BitLocker or device encryption considered.
- Reset performed with Remove everything and Clean data enabled.
- All internal drives wiped if the whole PC is being transferred.
- External drives and memory cards removed.
- Windows left at setup screen or cleanly reinstalled.
- Old personal files no longer visible.
A careful wipe protects your privacy and reduces the chance of identity theft, data leakage, or account misuse. For most modern Windows users, the built-in reset process with Remove everything and Clean data is sufficient. For sensitive data, combine encryption, secure erase tools, or professional destruction. Take your time, verify each step, and do not hand over the computer until you are confident your information is gone.