WordPress memory exhausted error is one of the most common errors in any WordPress site. Probably faced while importing theme demo, executing a large file, etc.
To fix this, you need to increase the PHP memory limit in your WordPress site.
So in this article, I’ll help you to fix WordPress memory exhausted error just by increasing PHP memory.
Increase PHP Memory Limit: 3 Methods
We are covering 3 methods to increase the memory limit:
- Using wp-config.php
- Through .htaccess
- And php.ini
But before increasing it, you should check out what’s your actual WP memory limit.
How to Check the WP memory limit?
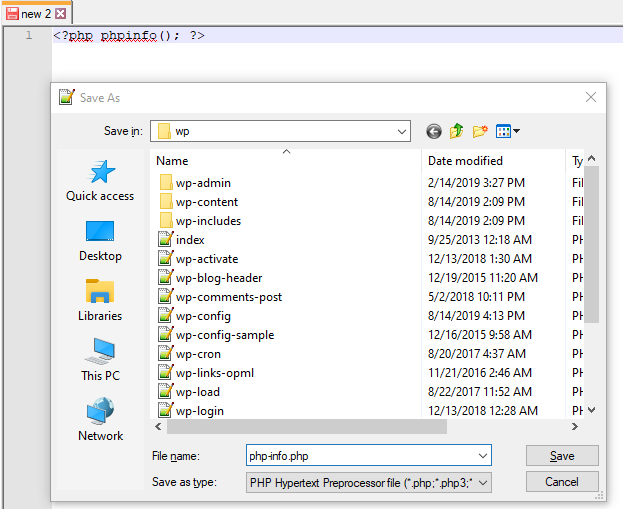
The best way to check the PHP memory limit is to create a PHP file on your server like php-info.php (you can name anything) and put the following code in it.
<?php phpinfo(); ?>
Once you put the code, upload it on your server’s public_html directory. You can access it using FTP client software or File Manager in your cPanel.
 Now open this file in your browser, to open it write down your domain and file name like this domain.com/php-info.php. There you will see a table list containing all configuration info about your current PHP environment (including PHP memory limit).
However, this is not recommended as having this file on your site leaves you vulnerable to hackers.
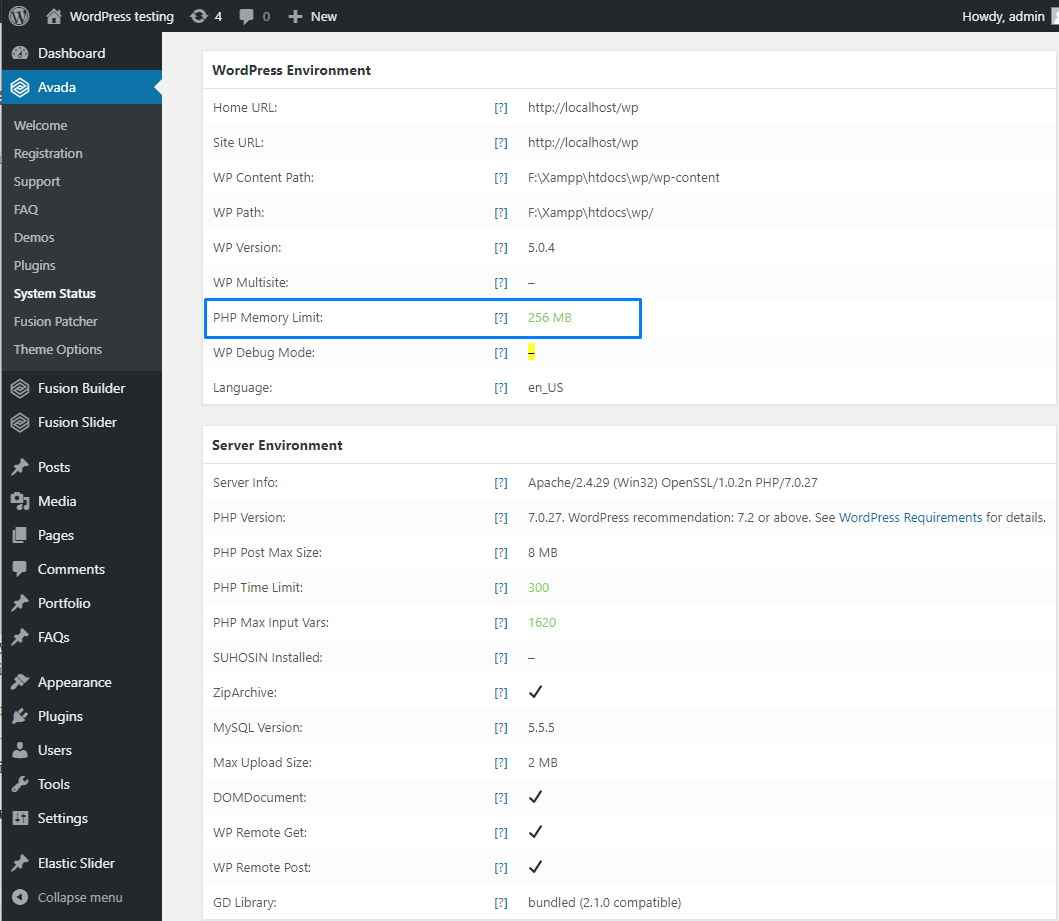
In case, you weren’t able to see there. You can even check-in system status page that comes in the theme like Avada, Newspaper, Jannah.
Or you can install Server IP & Memory Usage Display to know the current memory limit and view the current memory usage and the PHP version you are using in the dashboard and admin footer.
Once you know your memory limit stats, you can now decide how much memory limit your site needed and that’s the whole point to check memory limit of your site.
1. How to Increase PHP memory limit using wp-config.php
This the most likable method people like to use. To do this, you need to edit the wp-config.php file on your WordPress site as it located in your WordPress site’s root folder.
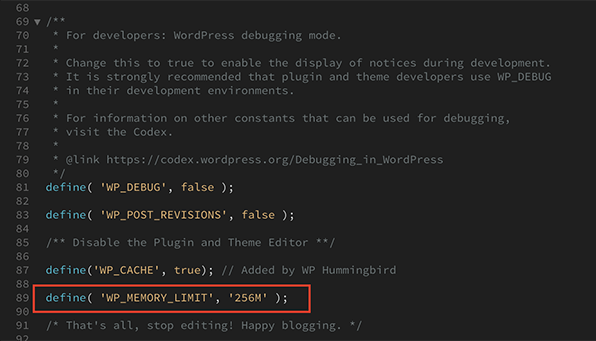
Once you open this file in a text editor, paste below code in the wp-config.php file just before the line says ‘That’s all, stop editing! Happy blogging.’
define( 'WP_MEMORY_LIMIT', '256M' );
Next, save your changes and upload the wp-config.php file back to your server. And this code tells the server to increase the PHP memory limit to 256MB.
Now, refresh your site to see if the error is gone. If you are getting errors while working in the admin area of WordPress then you’ll need to put one more line in your wp-config.php file.
Add this extra line to increase the PHP memory limit for the admin area:
define( 'WP_MAX_MEMORY_LIMIT', '256M' );
If the error keeps coming, try to allocate more memory because admin tasks require more memory.
Now, maybe you wonder, why these values specify to 64M, 256M, 512M, why can’t I just put 300M instead? but it won’t gonna work. Because you actually putting ram value and RAM come in specific sizes.
2. How to Increase PHP memory limit using .htaccess
If you’re not comfortable with wp-config.php, no worry you can do this via .htaccess too.
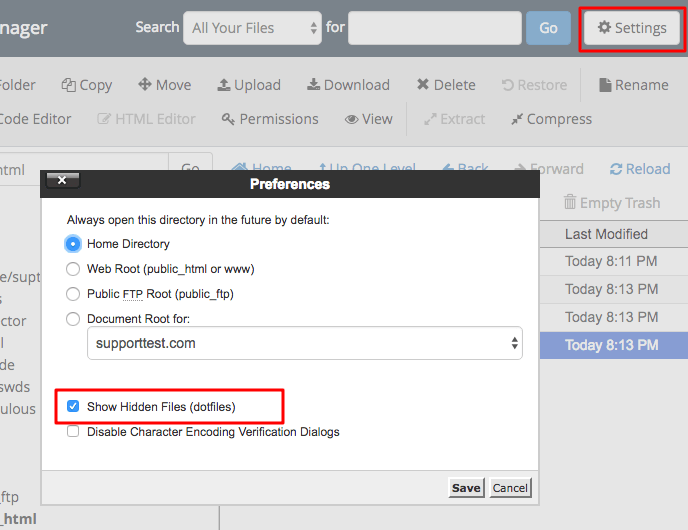
Your .htaccess file starts with a dot because it is a hidden file. So if you don’t see it in your root folder, make sure that your file manager isn’t keeping those files hidden from view.
Once you found, open the file in a text editor and add below code to your .htaccess file:
php_value memory_limit 256M
Next, save your changes and upload it to your root directory. Refresh your site to see if the error is gone. If this doesn’t work, then you need to contact server administrators.
Read more:
3. How to Increase PHP memory limit using php.ini
Php.ini is one of the essential configuration files in PHP. It is used to control variables such as memory size, max upload size, max time for execution, upload directory, display errors, log errors, etc.
To increase memory size, you need to find this file in your server. You’ll most likely find it in the root folder, but the location of the file will vary by host.
There is one simple way to find out exactly where the php.ini configuration file located. As I mentioned earlier how to check memory size. Same as that you need to create a PHP file and add following code in it.
<?php phpinfo(); ?>
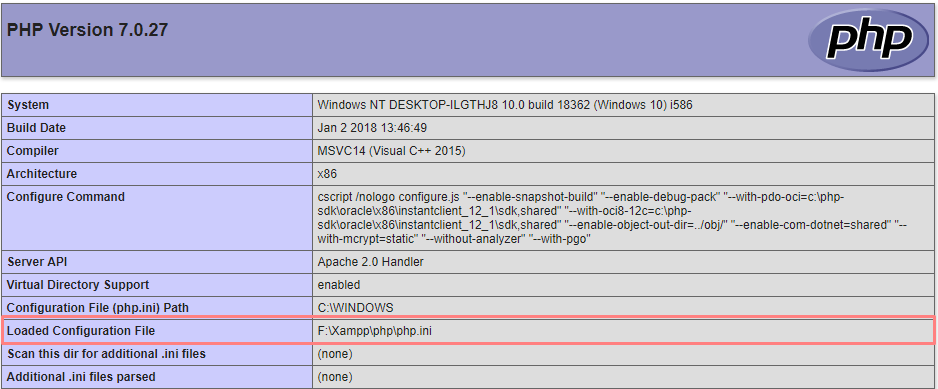
And you can able to check php.ini file location just by opening this PHP file in your browser.
Once you find php.ini or php5.ini file, open it in a text editor and paste the following code in it to increase memory size:
memory_limit = 256M
Next, save your changes and upload back to your server.
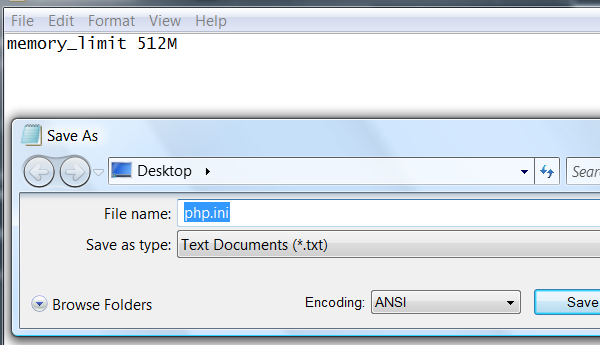
Or in case if you aren’t able to find. Just Create one as php.ini by any text editor, paste exact code memory_limit = 256M and upload it in your root directory.
You’re still having a problem?
If these solutions does not work for you, then this means your web hosting service provider does not allow WordPress to increase PHP memory limit.
You will need to ask your web hosting provider to increase your PHP memory limit manually.
Sometimes your hosting limits the amount of memory to use, especially shared hosts. Even, many shared hosting providers don’t even give you access to your php.ini file.
In these cases, it may be time to upgrade your hosting setup to WordPress hostings.