You wonder how can you add Icons to WordPress menus without a plugin? However, adding icons to your site’s navigation menu gives your visitors some visual clues about the content and also adds a nice design touch to your site.
Usually, WordPress navigation menus are plain text links. These links work for most websites, however, you can make your navigation menu look more interactive by adding image icons.
So definitely thinking that how it would possible to add icons next to each item in your navigation menu without any plugin while WordPress doesn’t have such feature. But Instead of the plugin, we’ll use the Font Awesome icon library, just calling it from your theme’s functions file (You could add via a plugin too).
Font Awesome is one of the absolute best. But unfortunately, you can’t just jump in and start using Font Awesome icons on WordPress menus right away. Instead, you’ll need to do some steps before you can add icons to WordPress Menu without plugin.
We’ll also demonstrate how you can do this by a plugin. Now let’s take a look at how to easily add image icons to WordPress menu. But before doing this you have to Add Font Awesome Icons to WordPress.
A quick tutorial: In your theme folder, by using any FTP client software find functions.php. Once you find open the file in a text editor like notepad++ and add below code to your functions file
<?php function wmpudev_enqueue_icon_stylesheet() { wp_register_style( 'fontawesome', 'http:////maxcdn.bootstrapcdn.com/font-awesome/4.3.0/css/font-awesome.min.css' ); wp_enqueue_style( 'fontawesome'); } add_action( 'wp_enqueue_scripts', 'wmpudev_enqueue_icon_stylesheet' ); ?>Once you had done, you can use the CSS classes in each menu item to add icons to our menu.
Adding Icons to WordPress Menus Without Plugin
In the WordPress dashboard, go to Appearance > Menus for editing your navigation menu. Over there you can create a new navigation menu If you haven’t already created a menu, and make sure you’ve ticked display location as a “Primary Menu”.
You might not able to see CSS Classes in a menu item so for this, you need to switch it on first.
- At the top of the screen, click the Screen Options drop down tab.
- Make sure the box next to ‘CSS Classes’ is checked.
- Close the Screen Options tab.
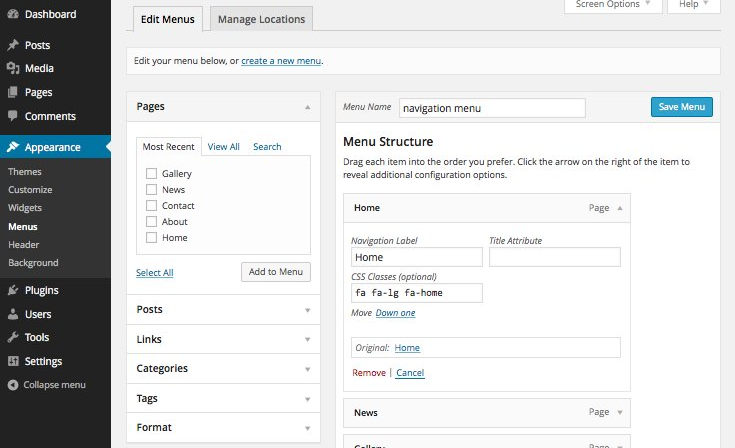
Now you’ll able to add a CSS class to each of your menu items. Next, you have to search for icons classes on the Font Awesome icons page. Like for a Homepage, CSS class will be:
fa fa-lg fa-homeAnd these 3 classes stand for as below.
fais mandatory used for all items with a Font Awesome iconfa-lgsets the size of the icon to largefa-homerelates to the specific icon you want to display
Now do the same for each of your menu items. You’ll find more icons and their classes on the Font Awesome icons page.
And you can use whichever icons you want. Just make sure you add fa fa-lg and then the class for the icon to each navigation menu item in the ‘CSS Classes’ field. For Example:
- Home:
fa fa-lg fa-home(as above: a house icon) - News:
fa fa-lg fa-newspaper-o(a newspaper icon) - Gallery:
fa fa-lg fa-camera-retro(a camera icon) - About:
fa fa-lg fa-info-circle(an info icon) - Contact:
fa fa-lg fa-envelope-o(an envelope icon)
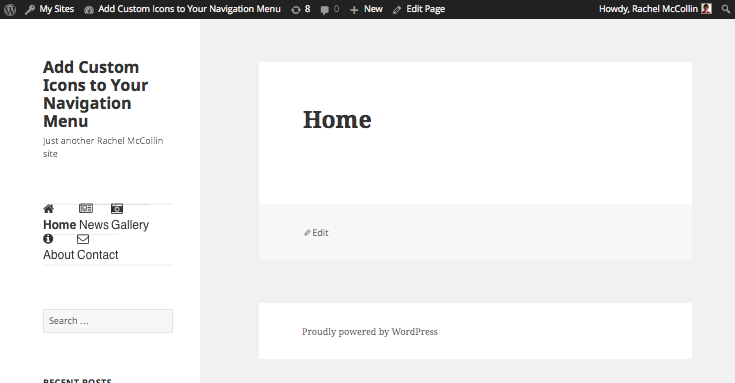
Once you have done save your menu by clicking the Save Menu button and check for changes by visiting your site.
You can also style and change the size of icons. For more information refer to this article: Style Font Awesome Icons and Resize
Adding Icons to WordPress Menus With a Plugin
If the above method is not worked for you and you’re site looks like this. You should use better or premium themes.
OR you can try a plugin instead and it’s recommended for beginner users because it doesn’t involve code.
The first thing you need to do is to install and activate the Better Font Awesome plugin. For more details, see the guide on how to install a WordPress plugin.
Once you activated a plugin, you can find this plugin’s setting in WordPress setting panel that you can access by going to Settings → Better Font Awesome, or you can leave as default.
With the plugin method, you don’t need to always copy CSS classes to insert Font Awesome icons in posts or in the nav menu. Because when you create a new post or page, you’ll notice a new Insert Icon button next to the Add Media button will add. If you click on it, you’ll see all the available Font Awesome icons, as well as an option to filter the results.

Now just click on a chosen icon just like in the above image (download) and that’s it.