
Getting your logo in front of customers is one of the easiest ways to make sure you’re remembered. Sure, they might not remember the exact name of your company. Still, it will leave them with a familiar feeling, which automatically builds customer trust and results in better brand recognition.
If you’re reading this article, it’s fair to assume you already have a logo and want to add it to your Gmail signature. It is an excellent idea as your brand imagery is remembered passively by those you communicate with, and it is super simple to do it, so why not just go for it?
So, if you already have a logo in place and want to add it to your Gmail signature, let’s get straight into it.
Creating a Gmail Signature
This short how-to tutorial will help you create a Gmail signature and add your logo to it. However, if you’re using another email provider, you might want to check out their instructions as these are pretty platform-specific.
Step 1
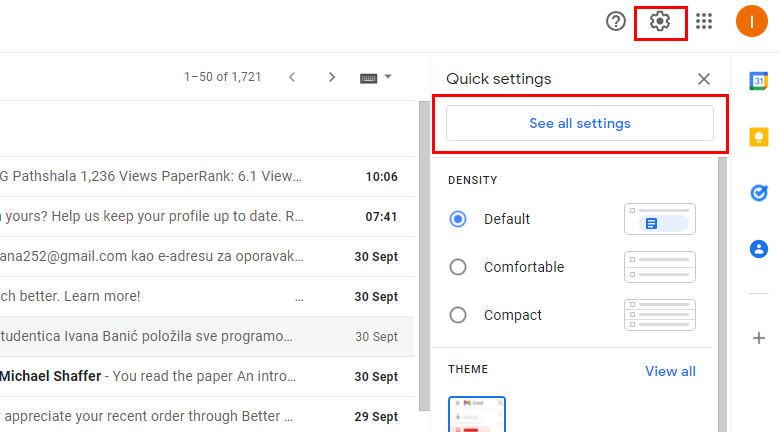
Open up your Gmail account and find the “Settings” tab in the upper right corner. Just look for the little gear icon, and there it’ll be. Once you click on it, navigate to” See all settings,” it’ll be the first option in the tab. Opening this up will take you to the “General” settings, and this is where you’ll find the signature form.
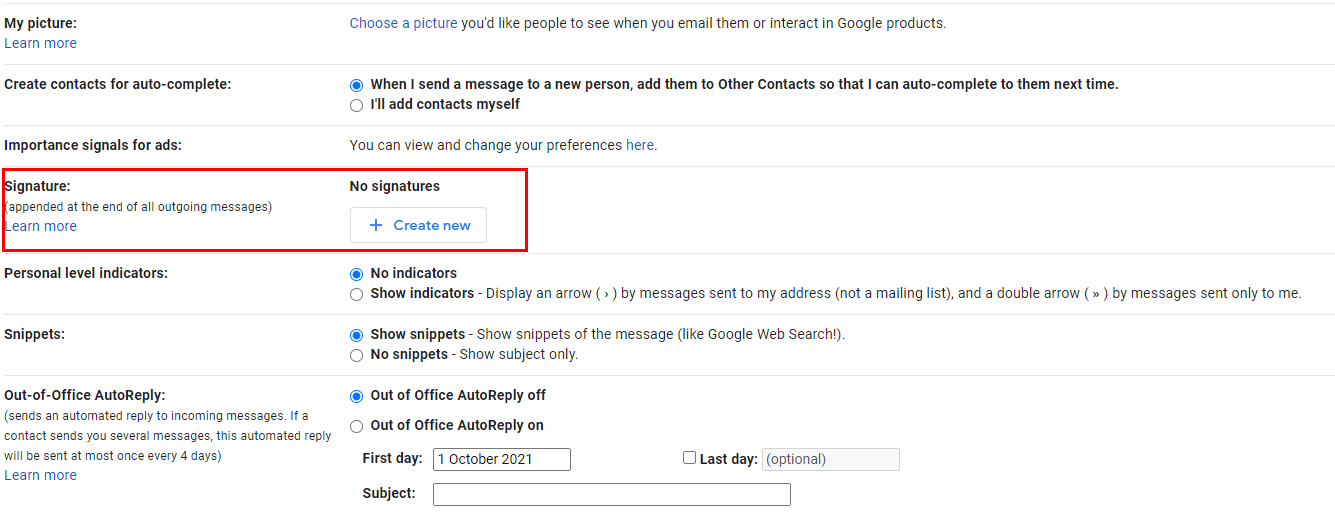
Just keep scrolling until you find what you’re after. Once you’ve located the form, you can start working on your signature. Note that if you haven’t already created one, the field will be empty, and you have to make one from scratch. So, we’ll show you every step of the way just in case.
Step 2
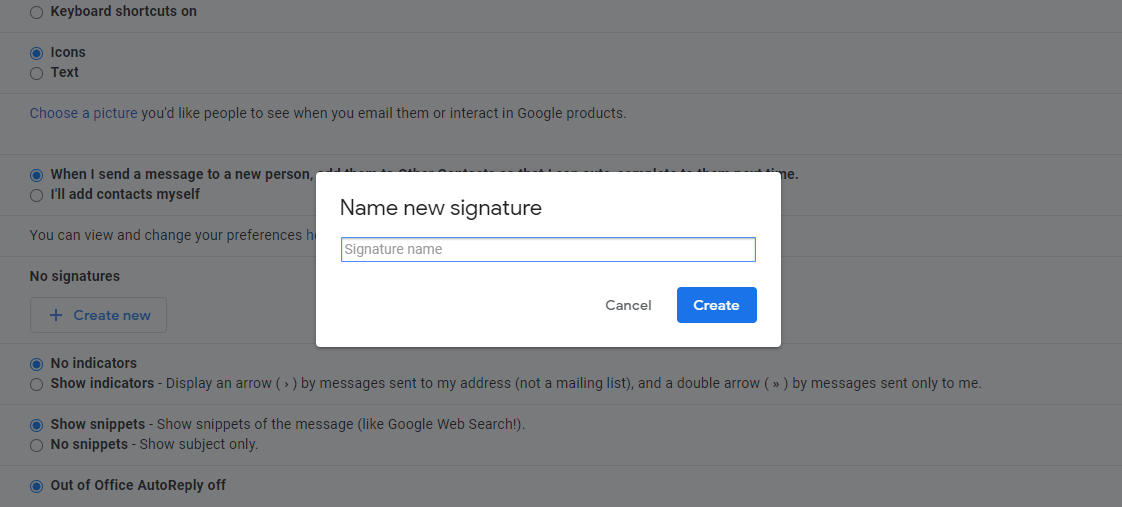
Click on “Create New.” The first thing you’ll have to do is input a signature name, which can be your name, the name of your company, brand, etc. You can also change this later, so there’s no need to worry about it if you mess something up.
Step 3
During this step, you’ll want to add the information you want to appear in your signature. Such as the info your outgoing emails will carry about your brand. You don’t want to overdo it, but you also want to leave important contact information to give your emails a professional feel.
Most people usually add their name, website, job title, office number or mobile number, address, email address, and the like. Just that information is perfectly sufficient. It’ll probably get skipped over if you add more, as it’ll become too overwhelming to look at.
In addition, you’ll probably want to highlight more critical information by creating some hierarchy. Like putting the essential information on top, italicizing, making your name bold, and so on. Here’s an example:
Jane Doe
CEO
555 – phone number
456 Some Street, A City Somewhere
In this example, we bolded the name, italicized the rest, and made it slightly different; this accentuates the information you want to notice first but doesn’t remove anything meaningful from the equation. You can also mess about with fonts if you’d like, but you should follow some rules to email typography. For instance, don’t use comic sans, but I’d venture to guess you already knew that.
Step 4
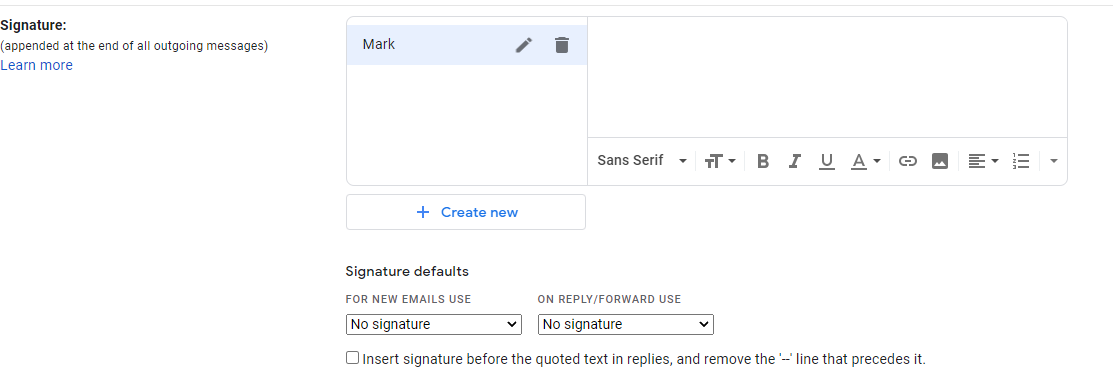
Once you’re thrilled with what you’ve done, you can move to add a logo. This process is much the same as adding an image to anything else. Navigate to” Insert Image” ( a small icon at the bottom of the editor). Gmail gives you three different ways of adding an image to your signature; uploading one straight from your computer, uploading an image from Google Drive, or via a URL directly from your website.
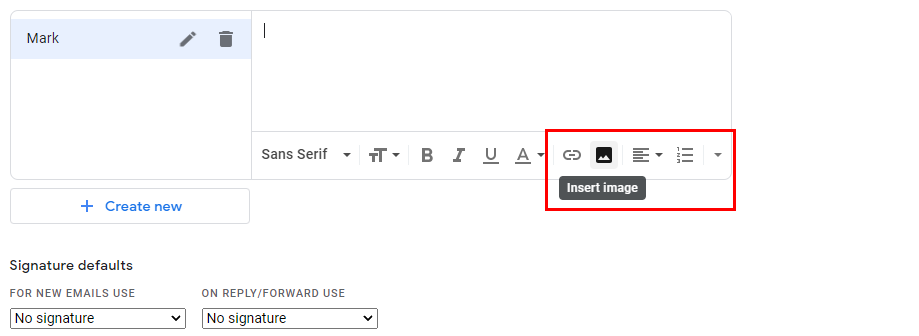
Google Drive is probably the easiest way, so we suggest that one, but it is up to you at the end of the day. Once you find the logo image file, drag it to the correct place, and it will soon be uploaded. The image you upload may be too big to resize by clicking on it and choosing the small or the medium option. From here, you can move on to arrange it by your text.
Step 5
Play around with the elements until everything is to your satisfaction. Maybe you want the text color to match your logo colors.
Some businesses like to add a tagline or a special promotion underneath the logo as an image is the first thing that draws attention. Feel free to do this, but remember to remove it if you’re taking this as an opportunity to promote a time-limited offer.
Step 6
Once most of the process is complete, the only thing left is to add any vital link to the signature. To do this, highlight the text element of your logo ( or any other part where you wish to add a link) and click on the “Add Link” tool – a little icon that looks like a chain next to the image icon.
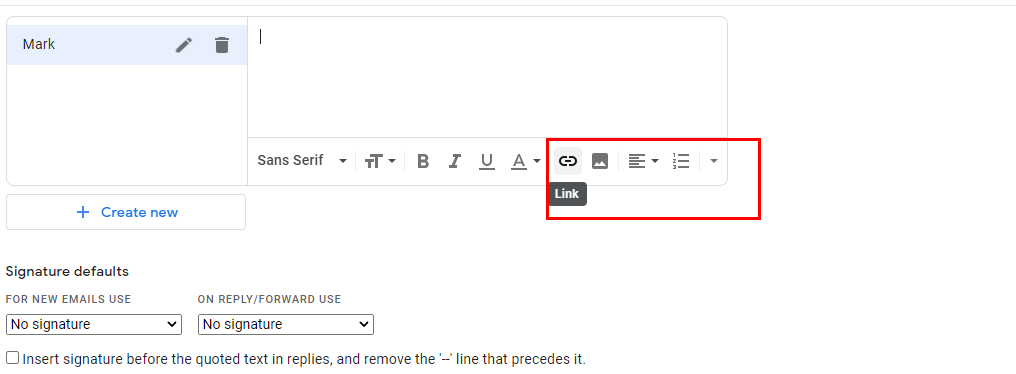
It will open up a box where you can add any link you want. You can link it to your homepage, or if you added a unique product promotion, you could add that URL. Once everything is done and you’re ready to go, you can send it out to your team so that everyone can have a company signature in their business emails.
Final Thoughts
Consistency, brand image, and marketing are all critical facets of any business. While adding a logo and links to your Google Gmail Signature might seem a bit silly at first, it’s a good thing to do. Plus, it doesn’t cost you anything, and it can help all of the aspects we mentioned above, so give it a try; it is simple.