You wonder how can you install Let’s Encrypt SSL certificate on your WordPress site? If yes, stay tuned.
SSL stands for Secure Sockets Layer and it’s a standard security protocol for establishing encrypted links between a web server and a browser.
When an SSL/TLS certificate is installed on a web server, It provides the encryption technology to secure the connection between a user’s browser and the web server.
Table of Contents
- What is the Let’s Encrypt SSL
- Install Let’s encrypt SSL on WordPress Site
- Method 1: Install Let’s encrypt SSL certificate via Shell access
- Setup Shell access to install SSL certificate
- Install SSL certificate via SSH
- Method 2: Install Let’s encrypt SSL certificate via Cpanel
- Move Your WordPress Site to HTTPS
- Update database URLs
- Update the Site Address
- 301 Redirects in .htaccess
- Update Google Analytics Settings
- How to renew Let’s Encrypt SSL certificate
- Why Let’s Encrypt SSL certificate’s last for 90 days Only?
- Tips to secure your WordPress website:
- Advantages of having an SSL certificate on WordPress site
- Types of SSL Certificate Validation:
However, the website’s URL is prefixed with “HTTPS” instead of “HTTP” and a padlock is shown on the address bar.
What is the Let’s Encrypt SSL
Let’s Encrypt is a free SSL provider, automated, and open certificate authority (CA), run for the public’s benefit. It is a service provided by the Internet Security Research Group (ISRG).
Let’s Encrypt is sponsored by many companies including Google, Facebook, Sucuri, Mozilla, Cisco, etc.
As I said in the certificate validation section, it only offers Domain Validation (DV) certificates in free of cost. They don’t offer Organization Validation (OV) or Extended Validation (EV) primarily because the objective of Let’s Encrypt and the ACME protocol is to make it possible to set up an HTTPS server and have it automatically obtain a browser-trusted certificate, without any human intervention. This is accomplished by running a certificate management agent on the web server.
Now you understand who the heck is this let’s encrypt, let’s take a look at how you can add a free SSL certificate to your WordPress site with Let’s Encrypt.
Install Let’s encrypt SSL on WordPress Site
To enable/Install HTTPS on your website, you need to get a certificate (a type of file) from a Certificate Authority (CA – Let’s Encrypt). However, there are many ways to install Let’s encrypt’s free SSL on your WordPress site. Now You have to decide which one is suitable for you at best.
To figure out what method will work best for you, you will need to know whether you good at handling Shell access and also it’s very important to know that you have Shell access to your web host.
Note: Shell access/SSH:- SSH is a method of connecting to your server and interacting with it using direct commands instead of a graphical interface. In other words, SSH is another way to access your website by typing a line of codes.
Method 1: Install Let’s encrypt SSL certificate via Shell access
Installing SSL with the help of SSH client is very fast with no downtime. If you find this method easy then you can do this right away.
First, you need to go Let’s encrypt getting started page. As you can see there is no proper guide. They simply telling that the best way to use Let’s Encrypt without shell access is by using built-in support from your hosting provider. And I guess your web host doesn’t support built-in integration like Siteground, Cloudways etc.
Setup Shell access to install SSL certificate
For Installing Let’s encrypt via Shell access you will need to use the Terminal software. In this case, I’m going to use PuTTY terminal software. All you have to do install PuTTy on your computer, if you have MAC then you don’t have to because it is built-in. Click here to download PuTTy for Windows.
Once you download, open it and it will look like below picture.
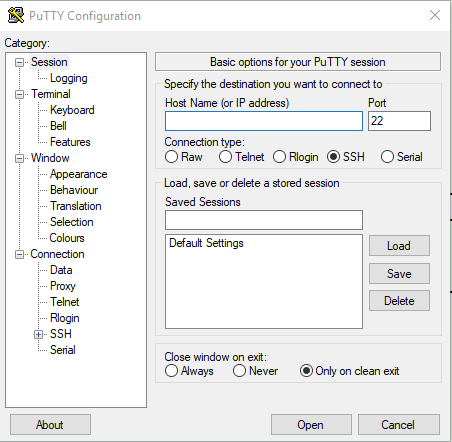
Follow below steps to connect to a server.
- Enter the IP address of your host
- Set port as default
- Connecting type should be SSH
- Click on Open
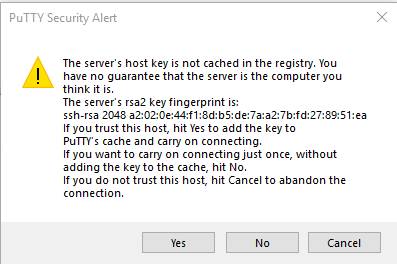
Now if you’re connecting for the first time, you will get a security error and reason for that because whenever you set up SSH the proper way to do it is that you need something a public and private key. And I didn’t set up but whenever you faced this warning just click yes since you’re connecting for the first time.
Once you hit click, you’re going to see this below screen.
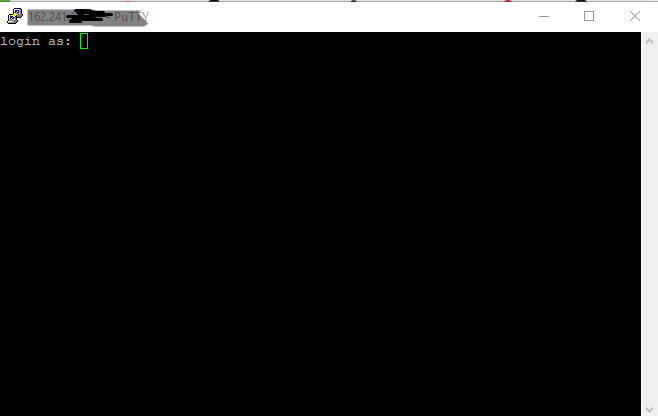
Now for the login default username is root so just type root and hit enter. Next, it will ask for a password but I want to mention something is whenever you’re pasting a password into the shell you don’t have to hold CTRL+V as we do in a browser or in a text editor. You just have to hold Shift+Enter and also nothing will appear on your screen because it doesn’t display for security reasons. If everything is right, you’re going to login you’re account.
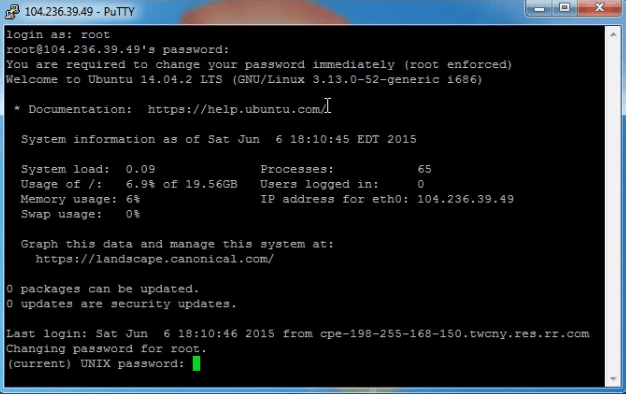
Now, since you’re very first login as a root you have to change the password so just paste current password and the new password as you like.
If you get something like Access denied error in shell screen while login. You should contact your host for SSH support.
Install SSL certificate via SSH
Now you’re connected to your server and it’s time for some commands.
Go to Cerbot site, and select your webserver software. In my case it is Apache and on system select hosting OS. If you’re on shared hosting then it should be Ubuntu trusty.

Once you select the desired option, this page will show some instruction that you have to follow.
Next, you have to install Certbot and some repository on your server via below commands.
Just paste one by one command and don’t forget hit enter after each command.
sudo apt-get update
sudo apt-get install software-properties-common
sudo add-apt-repository ppa:certbot/certbot
sudo apt-get update
sudo apt-get install python-certbot-apache
For processing each command will take some time so you don’t have to rush just be patient.
Once you have done, you should check your Cerbot version by typing
cerbot --version
If you’re able to see Cerbot version then you’re going well.
Now next process is very simple and easy. All you have to do is paste below command and follow a terminal instruction next.
sudo certbot --apache
Then it will ask for an email address for future notice so just type and hit enter.
Next, agree the terms and conditions as in terminal.
Now it will ask for domain names if you have one or two domain just type
www.example.com www.example2.com
Just don’t forget space after each domain.
Once you have done, you will see Congratulation message on the screen that means you have successfully install SSL certificate on your WordPress site via Shell access.
Since Let’s Encrypt certificates last for 90 days. it’s highly recommended to enabled Auto-renew just by pasting below code.
sudo certbot renew --dry-run
Method 2: Install Let’s encrypt SSL certificate via Cpanel
Installing SSL certificate via Cpanel is very simple and direct.
However, above SSH method is kind of difficult if you’re not familiar with Shell access. No worry this method will suitable for everyone as there are no commands included.
All you need is Cpanel access of your hosting server. Now let’s get started with Cpanel method.
As you know that Let’s encrypt doesn’t provide any guide to install certificate via Cpanel. So we have to find another way to do that.
I found one site that does the same job as Let’s encrypt but with Cpanel. Just follow below steps.
What you have to do is go to ZeroSSL, Click on Online tools. Next click on Start button as in below image.
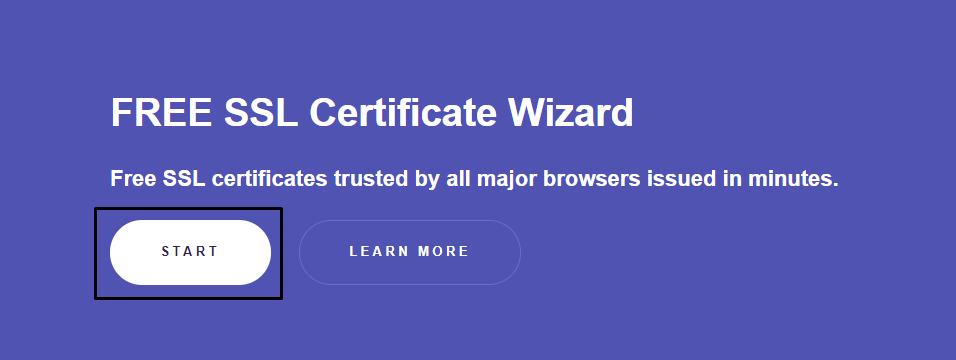
Once you click on start, you will see a bunch of fields to fill up.
On the right-hand side, you have two fields. As you don’t have CSR file now, you have to enter the domain name instead in an upper field called Domains(ONLY you have no CSR). So add your domains to this. Include www and without www. For eg. www.example.com example.com and don’t include HTTP:// or HTTPS://.
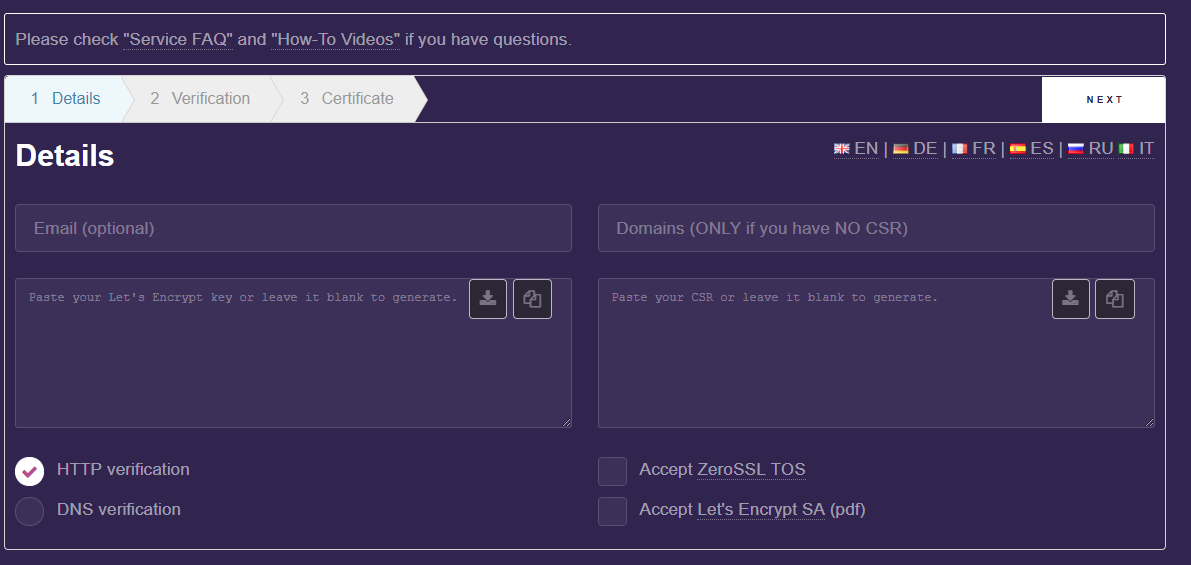
And on the left-hand side, enter your email for future notices. Once you filled, Accept the ZzeroSSL TOS & let’s encrypt SA by checking marks.
- Hit the Next button in the top right corner.
- ZeroSSL will generate the CSR (Certificate Signing Request).
- Once CSR is generated, download the copy
- Click “NEXT” again to generate account key, then download an account key copy
- Click “NEXT” to go to a Verification page.
Now ZeroSSL will give two files that you have to upload in this htdocs/example.com/.well-known/acme-challenge/
directory. For uploading text files, go to Cpanel > File manager and go to the root folder of your domain just like in below image. Or you can also use FTP client for navigate to your site.
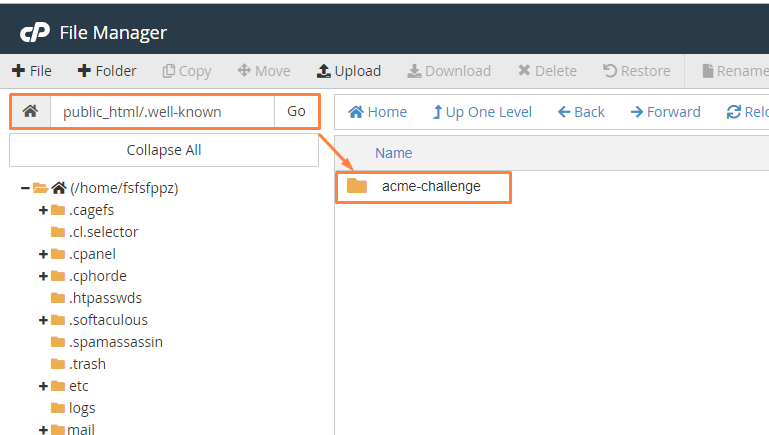
If you add only one domain with www. then you will get only one text file to verify domain ownership just by uploading given file to your server.
Now create the same directory pattern as above. In some cases, it’s already created on your server so you just have to upload given file.
Now go back to ZeroSSL for domain verification. You can verify your text file destination by click on file link next to the domain name.
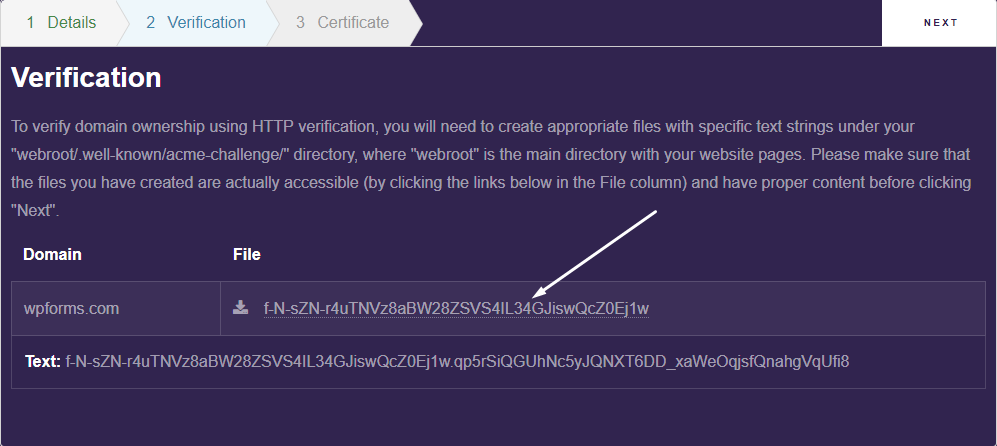
If it returns this page with numbers & characters instead of 404 error, you are good to go. If not then check again that the URL path contains mydomain.com/.well-known/acme-challenge
Next, Click on “next” to verify domain ownership. Now Your Certificate is ready now, so if you scroll down you’ll see two forms of keys. Download both CRT & Private key (Don’t confuse between these files).
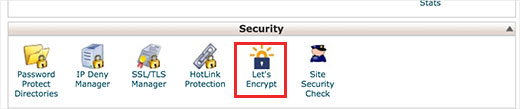
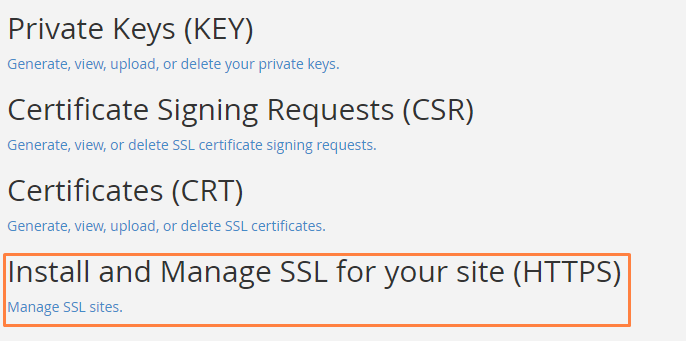
Now go back to the Cpanel and find SSL/TLS under the security tab.
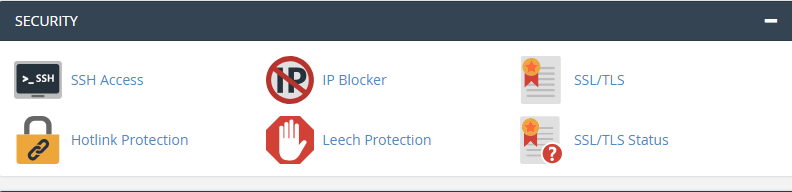
Click on SSL/TLS, scroll down little and again click on Manage SSL Sites
Next, select the domain you want to install the SSL certificate on.
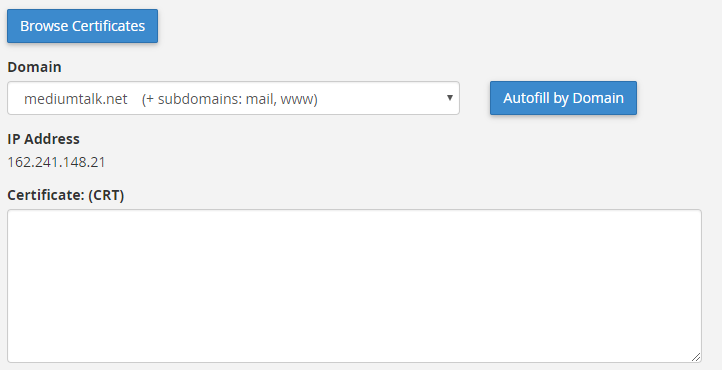
And now you to fill these fields
- Certificate: (CRT)
- Private Key (KEY)
- Certificate Authority Bundle: (CABUNDLE)
Return on ZeroSSL, copy the first field and paste in Certificate(CRT) field.
Now you just copy two keys from the first field in ZeroSSL. Because the first field includes both CRT & Certificate Authority Bundle. Now scroll from down to upper and copy the down one key (upper one key is CRT) and paste in CABUNDLE field. (You’ll be specified with —–Begin certificate — and —-End certificate —–).
- Again go back to ZeroSSL and copy Private key.
- Go to Cpanel paste the private key in the 2nd field (Private Key)
You should have three green check marks next to fields; this means everything matches. Next, at the bottom of the page click on “install certificate”.
Now what? your SSL Certificate is now installed, and you should have https. Test that it works by adding https:// to in front of your domain.
If it shows exclamatory sign then your page has some mixed content.
![]()
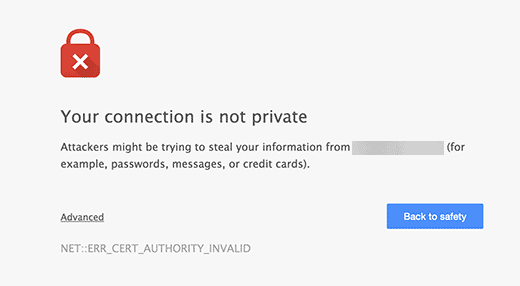
For achieving green padlock, you make sure that you don’t have any link starting from HTTP in a page. Otherwise, any browser will show an error (Your connection to this site is not fully secure) just because of the mixed content of HTTP and https in your website pages.
Now it’s time to move your HTTP site to https site.
Note: Below steps are compulsory for both SSH and Cpanel method for achieving green padlock and users can easily redirect to https.
Move Your WordPress Site to HTTPS
Alright, you installed Let’s encrypt SSL certificate on your WordPress website but there are some steps need to do, so stay tuned.
However, you need to fix the mixed content in your database first.
Update database URLs
Now it’s time to update any links in your content and database that include the old HTTP protocol. Your WordPress database has several hard-coded URLs that point to the ‘http’ version of your domain.
To update everything very quickly to ‘https’, we can use plugins like Velvet Blues or Better Search-Replace. This will change all internal URLs to use the new secure URL. So in this case, I’m going to use Better Search replace.
First, make sure you have a backup of your database. Just in case something goes wrong, you can easily replace your old database.
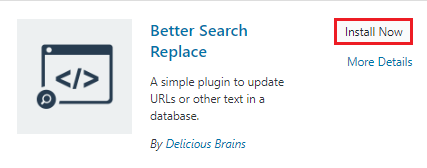
- In your panel navigate to ‘Plugins > Add New’.
-

Better Search Replace
-
- Click ‘Install Now‘.
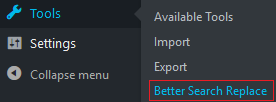
- Once you activated. Navigate to the plugin under ‘Tools > Better Search Replace’.
- Click the ‘Search/Replace’ tab.
- In the first field titled ‘Search for:’, enter your current HTTP URL. For example:
- http://www.example.com
- In the second field titled ‘Replace with:’, enter your HTTPS URL. For example:
- https://www.example.com
- Select all the tables.
- Check the box titled ‘Run as dry run?’. Because we don’t want direct changes without check.
- Click Run Search/Replace.

This should respond with a message at the top notifying you of what would have been updated.
If everything looks good, uncheck the Run as dry run and click On Run search/replace again for updating URLs.
Now you have done with updating URLs. As you can able to see a green padlock on https://.
Update the Site Address
After updating the database URLs to HTTPS, it’s time to do the same for site address in the WordPress dashboard. You can do this by going Settings > General
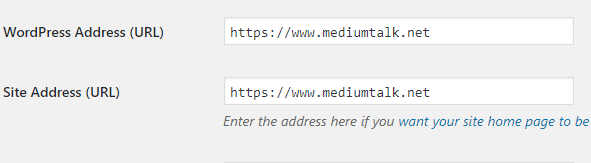
Add https:// to the beginning of both the WordPress address and site address. Then update your settings by clicking save changes. Once saved, you might need to log in again afterward.
301 Redirects in .htaccess
The last step is Redirection to send visitors automatically over to the secure version. We’ll do this with the help of .htaccess
This is an important and powerful system file located in the root directory of your website. It usually contains settings of the permalink.
To find this file, make sure to check show hidden files in Cpanel file manager or FTP because .htaccess is invisible by default. If you don’t have one, just create a plain text file, rename it to .htaccess and upload it to the WordPress root directory.
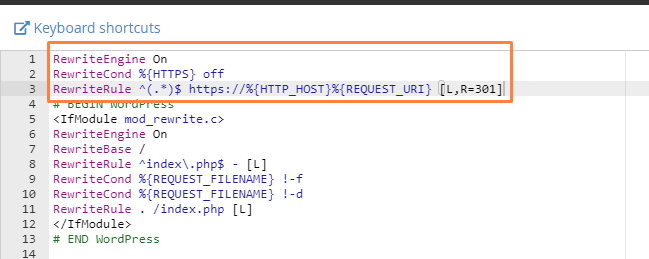
Once you find, open it in any editor and add the following lines to it:
RewriteEngine On
RewriteCond %{HTTPS} off
RewriteRule ^(.*)$ https://%{HTTP_HOST}%{REQUEST_URI} [L,R=301]
Refer below image just to make sure how it’ll look.
From now on, visitors (including Google bots) should automatically land on the HTTPS version of your WordPress site.
Update Google Analytics Settings
If you have Google Analytics installed on your WordPress site, then you also need to update its settings and add your new URL with https.
Login to your Google Analytics dashboard and click on ‘Admin’ at the top menu. Next, you need to click on property settings under your website.
There you will see the default URL option. Click on default URL dropdown button and then select https.

And Don’t forget to click on the save button to save your changes.
How to renew Let’s Encrypt SSL certificate
Let’s encrypt SSL certificate is last for 90 days. So before every 90 days, you have to renew a certificate.
The recommended way to renew Let’s Encrypt SSL certificates is using Cerbot. Just make sure you installed Cerbot on your server, I already explained in the above steps.
Cerbot checks all of the certificates that you’ve obtained and tries to renew any that will expire in less than 30 days.
If you do want to renew a specific certificate manually, you can use
certbot certonly --force-renew
and specify all of the associated domain names with -d for e.g.
certbot certonly --force-renew -d example.com -d www.example.com
Note: Add those domains that you want to renew.
Now take a close look at how to renew Let’s encrypt SSL certificate before it expires.
- Open any terminal software like PuTTY
- Login to your server
- Run below command to renew only one domain (www.example.com or example.com)
certbot renew
Refer below image just to make sure. ( you don’t have to type systemctl stop nginx)
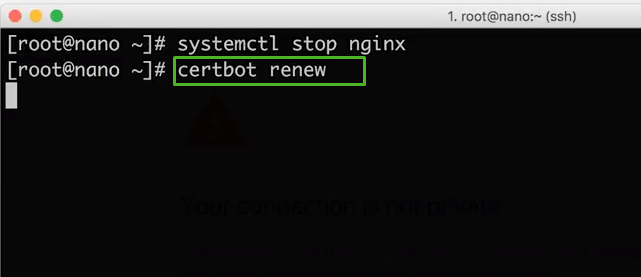
And hit enter to proceed renewal. Once you hit enter, it’ll take time to install new certificate and you ‘ll going to see congratulation message once you have done.
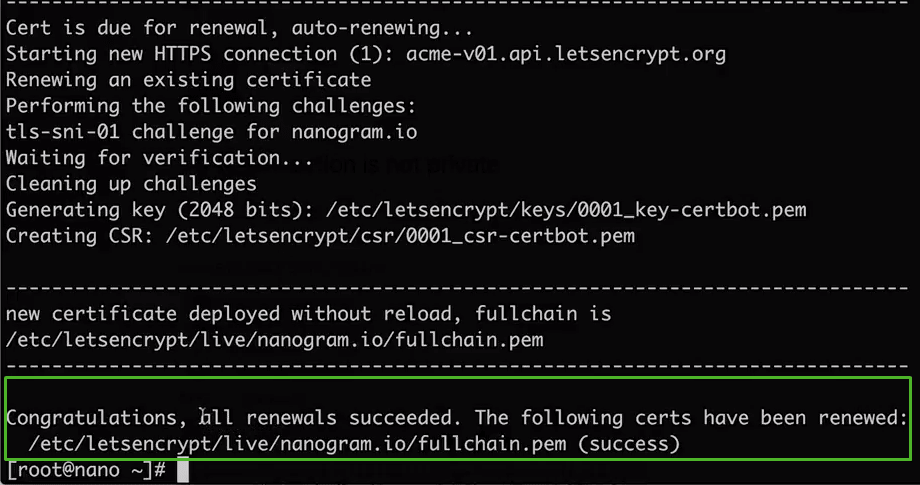
Why Let’s Encrypt SSL certificate’s last for 90 days Only?
You probably asking why only ninety-day lifetimes for this certificate.
Actually, 90 days is nothing new on the Web. According to Firefox Telemetry, 29% of TLS transactions use ninety-day certificates. That’s more than any other lifetime. According to let’s encrypt, there are two primary advantages to such short certificate lifetimes:
- Limit damage from key compromise and miss-issuance. Stolen keys and miss-issued certificates are valid for a shorter period of time.
- Encourage automation, which is absolutely essential for ease-of-use.
And it’s also not possible to move the entire Web to HTTPS, they can’t to manually handle renewals.
Tips to secure your WordPress website:
Using an SSL certificate and HTTPS is the easiest way to encrypt your data, but there are a few other things you can do to prevent hackers and malware from compromising your website.
As I said, SSL certificate has nothing to do with website security of someone hacking in your website. SSL certificates are for encrypting information on your site that goes from your website to someone’s computer. What’s doing is not preventing someone from hacking into your website.
Instead, you can use security plugins to prevent your site from malicious attacks by hackers and malware.
In simple, you’re protecting customer’s highly confident data from frauds and build trust among your users. Plus having HTTPS means a positive impact on your search engine ranking.
Suppose if you’re going to accept online payment on your site in form of credit card or debit card, I’m not talking about Paypal that someone goes to your website and click the button, then it takes them over to Paypal to complete payment. Because it does not require an SSL certificate.
- Keep your website up to date
Keeping all software up to date is vital in keeping your site secure. This applies to both the server operating system and any software you may be running on your websites such as a CMS or forum.
If you are using a managed hosting solution like InMotion, Cloudways and there are many. Then you don’t need to worry so much about applying security updates for the operating system as the hosting company should take care of this.
- Set Secure password
Using unique passwords for your admin panel is not enough. Use the Custom Login URL in your WordPress website, so it can make it harder for would-be attackers to login to your site.
Also, you’ll need to come up with complicated, random passwords which aren’t used anywhere. But equally also important to insist on good password practices for your users and enforcing password requirements such as a minimum of around eight characters, including an uppercase letter and number will help to protect user information.
- Take Regular Backup
You must back up your website regularly. In case, some damage occurs to your site; you must be able to revive it back in no time. Before doing any changes, you must ensure that you do have a backup of your website.
This is why WordPress always tells us to perform a backup before updating. Because the site has multiple components, including plugins, themes, software, and back-end programming.
These are some recommended security tips you must follow to secure your site as you could do.
Before jumping on how to add Let’s Encrypt SSL to your WordPress site, you should know about the SSL protocol.
Advantages of having an SSL certificate on WordPress site
- Encryption:
An SSL certificate helps to encrypt sensitive information such as logins, passwords, account details and cardholders information for e-commerce websites during Internet communication. Basically, The main idea is that all information is encrypted before being submitted.
- Authentication:
It is important to know that a website you would like to visit and where you want to make a payment is authentic and trustworthy. You must notice that the web browser analyzes the information received from the SSL certificate and decides whether the certificate is trusted or not. If a certificate doesn’t match, then most modern browsers will warn the user from connecting to the site.
- Google search ranking boost
Security is a top priority for Google. That’s why starting from 06/08/2014, Google announced that having an SSL certificate installed on your website will increase your ranking position, which is another great reason to use SSL and of course you don’t have to pay for it. For more information Click here (https as a ranking signal).
Types of SSL Certificate Validation:
There are mainly three types of validations: domain validation, business validation, and extended validation. All these vary according to their verification process and prices. However, Let’s Encrypt provide domain validation type of SSL certificate.
- Domain Validation:
Domain Validation is a primary level of authentication as it verifies the ownership of the domain name by entering some DNS record on your host.
Such a certificate can be issued in a few minutes and are low priced certificate cost 5$ to 10$. However, domain SSL carries the same encryption strength, but due to primary authentication, such certificate is ideal for newbie or start-ups. If you want a low priced SSL, then domain validation certificate will be the best choice for you.
- Organization Validation:
Organization validation certificate is on the second position, which requires verification of business identity by the CA. The certificate authority confirms that the website is an authenticate business before issuing the certificate.
The organization validation certificate is the best option for businesses carrying online transactions and accepting sensitive data. This certificate is ideal for small and medium business enterprises so if you want robust encryption and want to establish the identity of your business over the web at a moderate price, then the organization validation certificate is an ideal choice.
- Extended Validation:
Extended Validation (EV) is the highest form of SSL Certificate on the market. Hence; it turns the browser into a green address bar that offers customers and visitors to click on it to see the details of a verified organization and certificate.

Extended Validation certificate carries the same encryption with extended validation hence, it is ideal for businesses where financial transactions and sensitive information is carried out. Therefore, if you are financial institutions, e-commerce websites, then extended validation is the best option.
That’s it. You completely learn How to Add Let’s Encrypt SSL to WordPress Site. If you find this article helpful then don’t forget to share with your friends who need it.
Still, if you feel I missed something or you facing some problem, you can comment down below, we’ll help you out soon as possible.